Node Auth Keys
Pre-authorize devices for automated enrollment
Node auth keys allow devices to authenticate without user interaction. Use them for CI/CD pipelines, automated server provisioning, and IoT device deployment.
Overview
Normally, device enrollment requires a user to:
- Run
baseguard connect - Visit the authorization URL shown in the terminal
- Authorize the device in the browser
Auth keys skip this interactive flow—the device is pre-authorized to join.
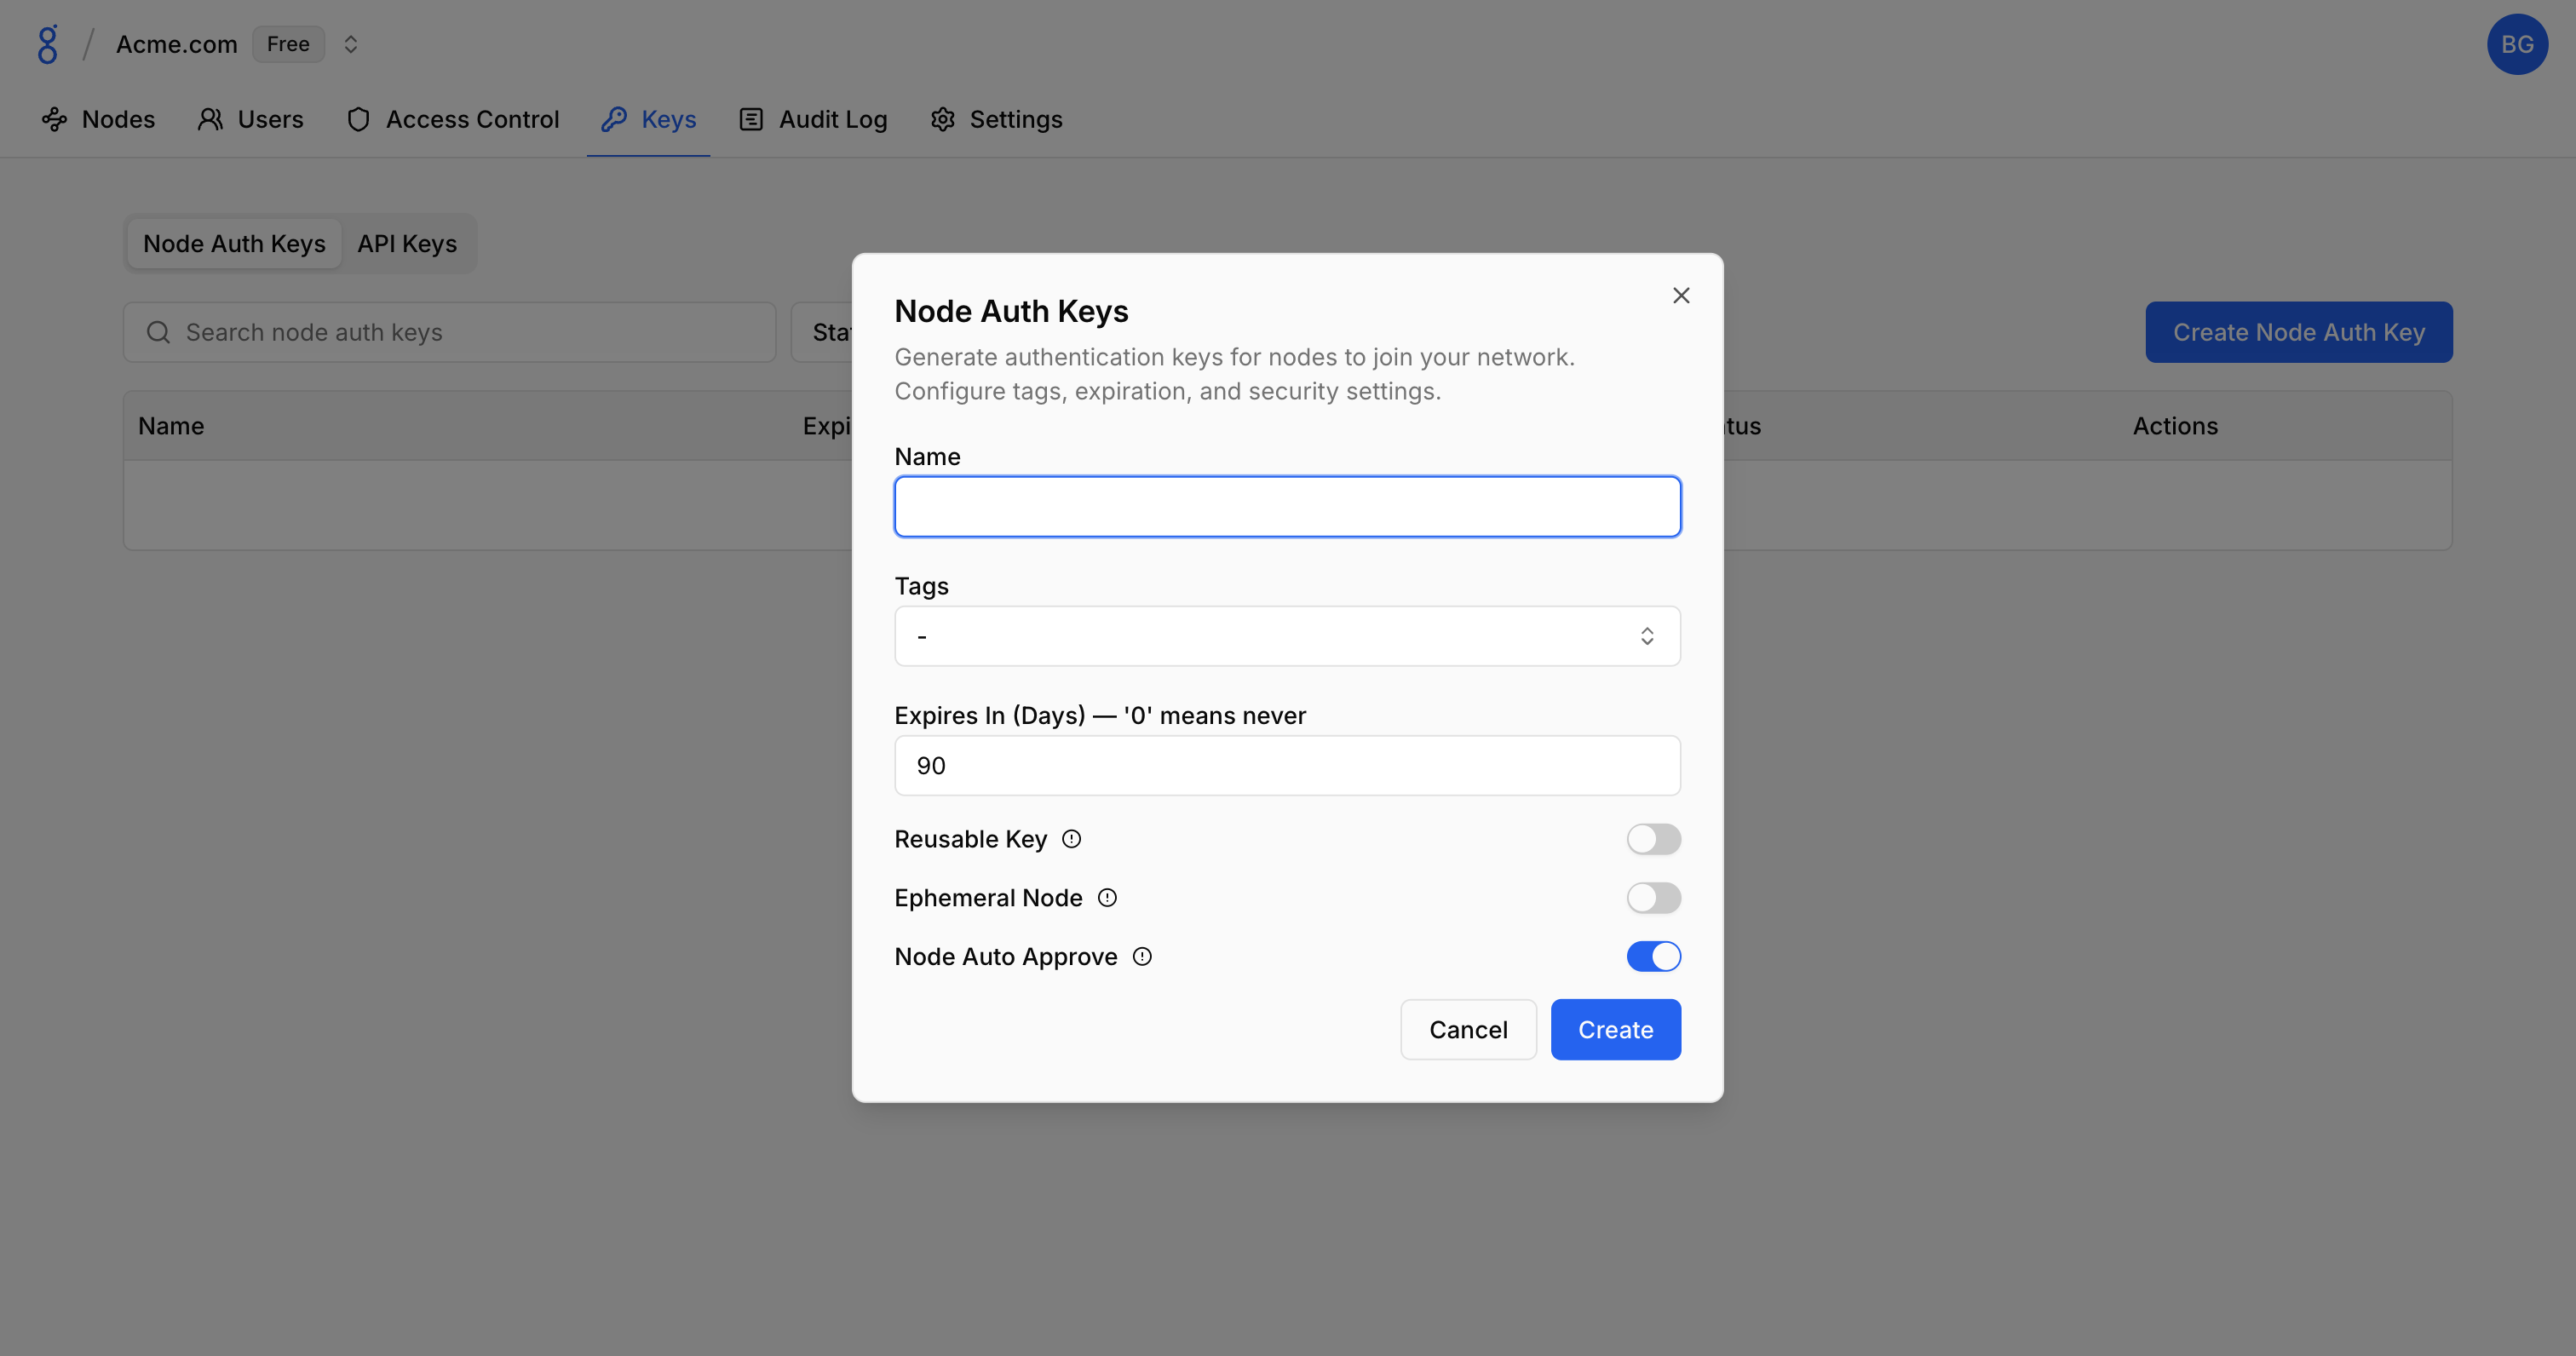
Creating Auth Keys
- Go to Keys and click the Node Auth Keys tab
- Click Create Node Auth Key
- Configure options:
- Name: Descriptive name
- Tags: Auto-assign tags to nodes using this key
- Expires In (Days): When the key becomes invalid (0 = never)
- Reusable Key: Allow multiple uses (off by default)
- Ephemeral Node: Delete node on disconnect (off by default)
- Node Auto Approve: Skip approval workflow (on by default)
- Click Create
- Copy the key (shown only once)
Pre-assigned Tags
Tags automatically applied to nodes using this key:
productionci-runneriot-device
Ephemeral
When enabled, nodes are automatically removed when they disconnect — ideal for CI/CD runners, temporary environments, and containers. See Ephemeral Nodes for more details.
Using Auth Keys
CLI
baseguard login --auth-key bgauth_xxxxxxxxxxxxxxxxxxxxCI/CD Pipeline
# GitHub Actions example
steps:
  - name: Connect to Baseguard
    env:
      BASEGUARD_AUTH_KEY: ${{ secrets.BASEGUARD_AUTH_KEY }}
    run: |
      baseguard login --auth-key "$BASEGUARD_AUTH_KEY"
      baseguard connect
Troubleshooting
See Troubleshooting — Authentication & Login Issues for auth key errors and Access Control Issues for tag assignment problems.
See Also
- CLI Login — Using auth keys with CLI
- Node Approval — Approval workflow
- Authentication — Auth overview
- Tags — Pre-assigning tags to nodes
- API Keys — API authentication